Step 1: Create Application Stack
Navigate to "Stacks", click "Add stack" and paste the contents of our stack.yml config template into the Web editor so that you can change the storage folder locations in the volumes sections as needed:
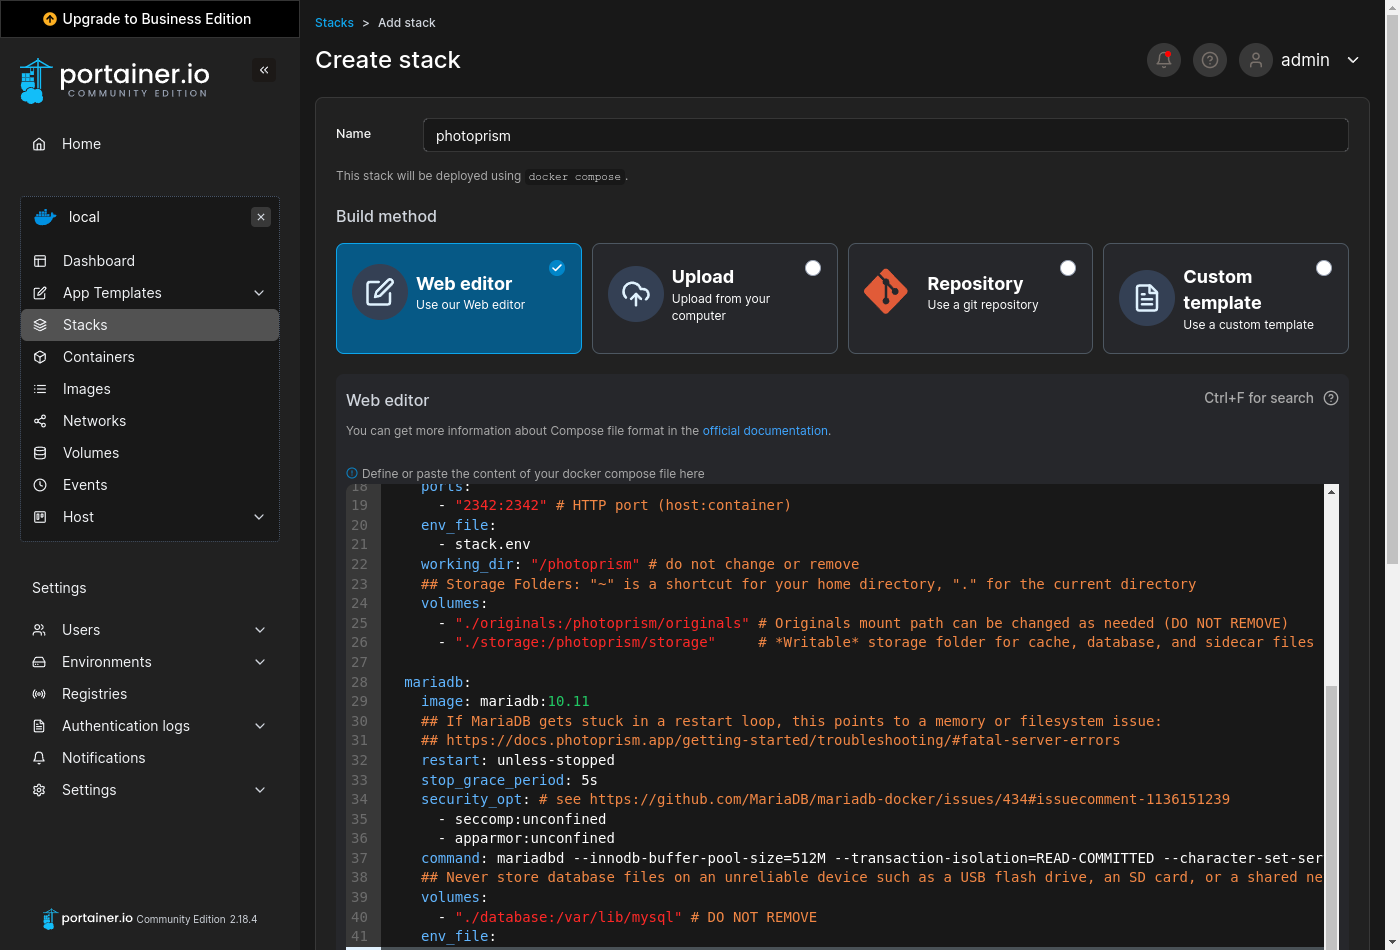
When using the Web editor, please make sure that related values remain on the same indentation level and that lists start with a dash as shown in our template.
Volumes
You need to explicitly specify the directories you want to use on your NAS device, since PhotoPrism can't see files in folders that have not been shared. This is an important security feature and allows for a flexible configuration without having to change any other variables.
It is important that all folders specified in the "volumes" sections are located on a persistent volume on your device. We recommend changing the relative paths used in our example to absolute paths in order to avoid potential data loss, e.g. if the default application folder managed by Portainer changes or is reset after an update.
The volume mount paths to configure depend on your NAS device and its settings. As on most operating systems, a dot followed by a slash
./can be used to specify a path relative to the current directory. If you keep the defaults, all files will be located in the internal application folder that Portainer automatically creates when you add a new stack.
Database
Our stack template includes a pre-configured MariaDB database server that stores its data in the internal application folder by default:
services:
  mariadb:
    volumes:
      - "./database:/var/lib/mysql"
If your NAS device has a mixed drive configuration with solid-state drives (SSDs) and traditional hard disks, we recommend that you change ./database to an absolute path located on an SSD as this significantly improves performance, for example:
- "/mnt/ssd/database:/var/lib/mysql"Database files should never be located on an unreliable device such as a USB flash drive, SD card, or network folder.
/photoprism/originals
The originals folder contains your original photo and video files:
services:
  photoprism:
    volumes:
      - "./originals:/photoprism/originals"
We recommend that you change ./originals to the directory on your NAS where your existing media files are, for example:
- "/mnt/photos:/photoprism/originals"Additional directories can be mounted as sub folders of /photoprism/originals (depending on overlay filesystem support):
    volumes:
      - "/mnt/photos:/photoprism/originals"
      - "/mnt/videos:/photoprism/originals/videos"
If you want to start with an empty library, you can mount any directory that has enough free space for your needs.
/photoprism/storage
The storage folder is used to save config, cache, thumbnail, and sidecar files. It must always be specified so that you do not lose these files after a restart or upgrade. If available, we recommend that you put the storage folder on a local SSD drive for best performance. You can otherwise keep the default to store the files in the internal application folder:
services:
  photoprism:
    volumes:
      - "./storage:/photoprism/storage"
Never configure the storage folder to be inside the originals folder unless the name starts with a . to indicate that it is hidden.
Should you later want to move your instance to another NAS, the easiest and most time-saving way is to copy the entire storage folder along with your originals and database.
/photoprism/import
You can optionally mount an import folder from which files can be transferred to the originals folder in a structured way that avoids duplicates, for example:
services:
  photoprism:
    volumes:
      - "/mnt/media/usb:/photoprism/import"
Imported files receive a canonical filename and will be organized by year and month. You should never configure the import folder to be inside the originals folder, as this will cause a loop by importing already indexed files.
Even if you don't specify an import folder, adding files via Web Upload and WebDAV remains possible unless read-only mode is enabled or the features have been disabled.
Step 2: Finalize Setup
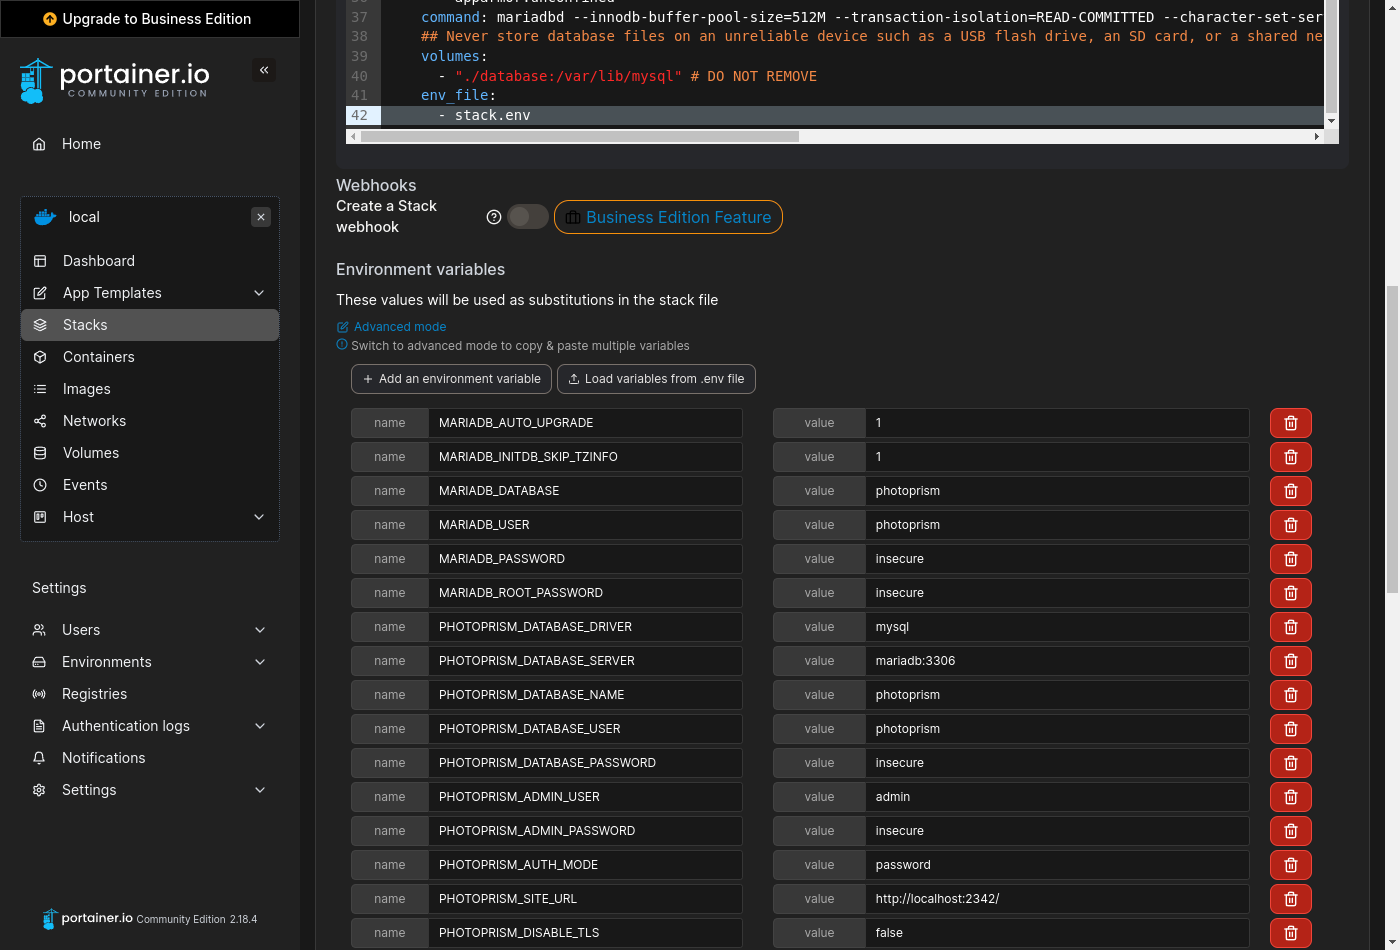
To complete the setup, download the stack.env file from our server (right click and Save Link As...), click "Load variables from .env file", upload it to Portainer, and then change the values according to your needs:
Always change
PHOTOPRISM_ADMIN_PASSWORDso that the app starts with a secure initial password. Never use easy-to-guess passwords or default values likeinsecureon publicly accessible instances. There is no default in case no password was provided. A minimum length of 8 characters is required.
It is not possible to change the database password with MARIADB_PASSWORD after MariaDB has been started for the first time. However, choosing a secure password is not essential if you don't expose the database to other apps or hosts. To enable automatic schema updates after upgrading to a new major version, make sure that MARIADB_AUTO_UPGRADE is set to a non-empty value.
When you are done, scroll down and click "Deploy the stack" without changing any of the other options:
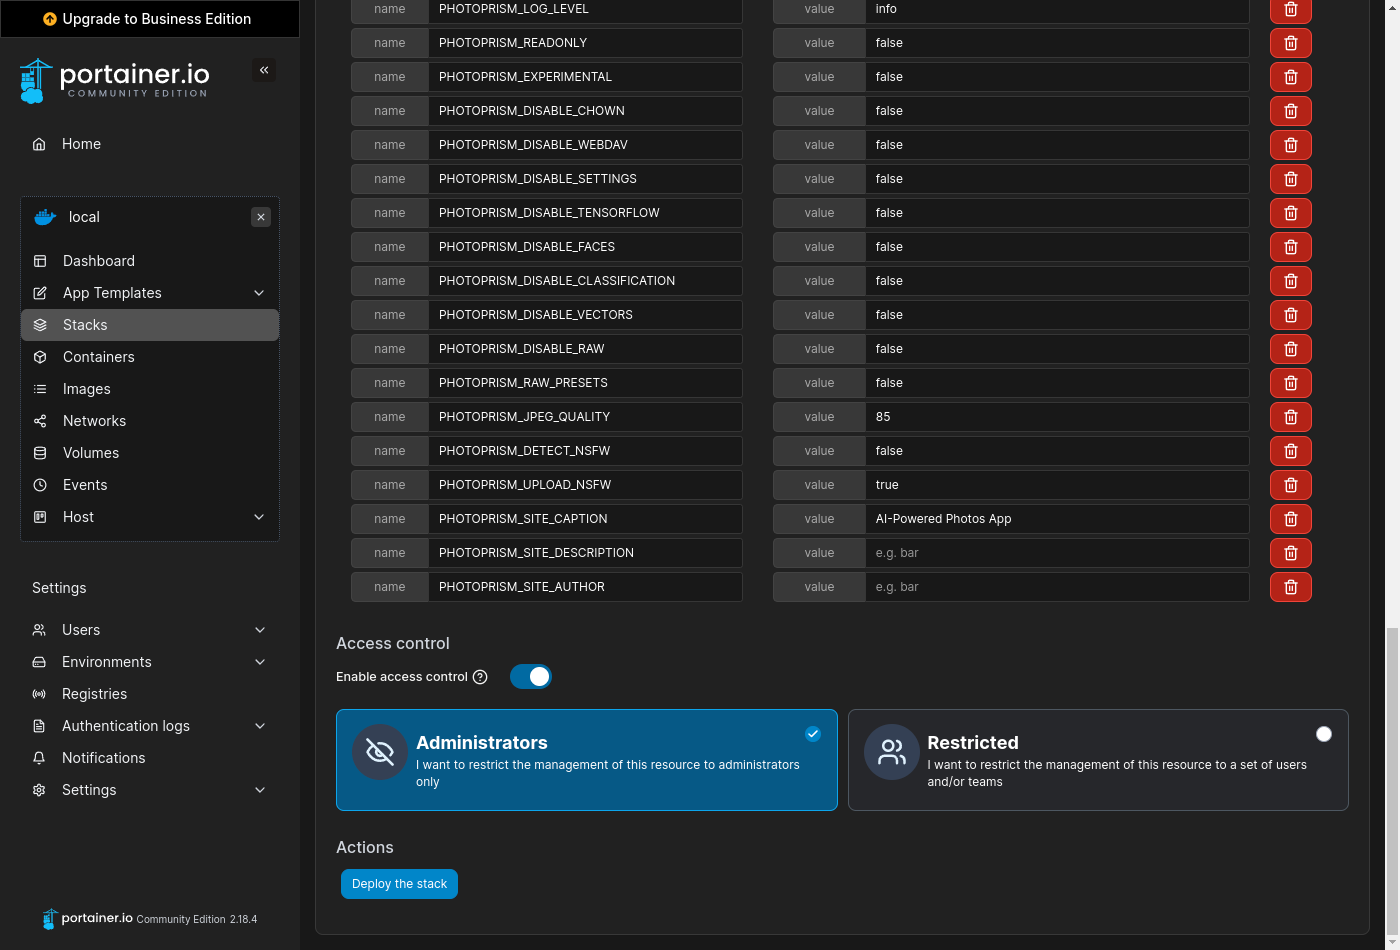
After waiting a few moments, you should be able to log in as admin with the password specified in PHOTOPRISM_ADMIN_PASSWORD when you navigate to http://localhost:2342/.
If you have modified the server hostname, port, or protocol in your configuration, the URL to use changes accordingly.
Getting Started
Our First Steps 👣 tutorial guides you through the user interface and settings to ensure your library is indexed according to your individual preferences.
The config options and container image you want to use can be changed at any time by navigating to "Stacks", selecting your existing PhotoPrism stack, clicking "Editor", updating the configuration to your needs, and then clicking "Update the stack" to apply the changes.
Activating Your License
You can activate your license by logging in with the admin user created during setup and then following the steps described in our activation guide.
Command-Line Interface
Opening a Terminal
Navigate to "Stacks", select the PhotoPrism stack and scroll down to the list of containers:
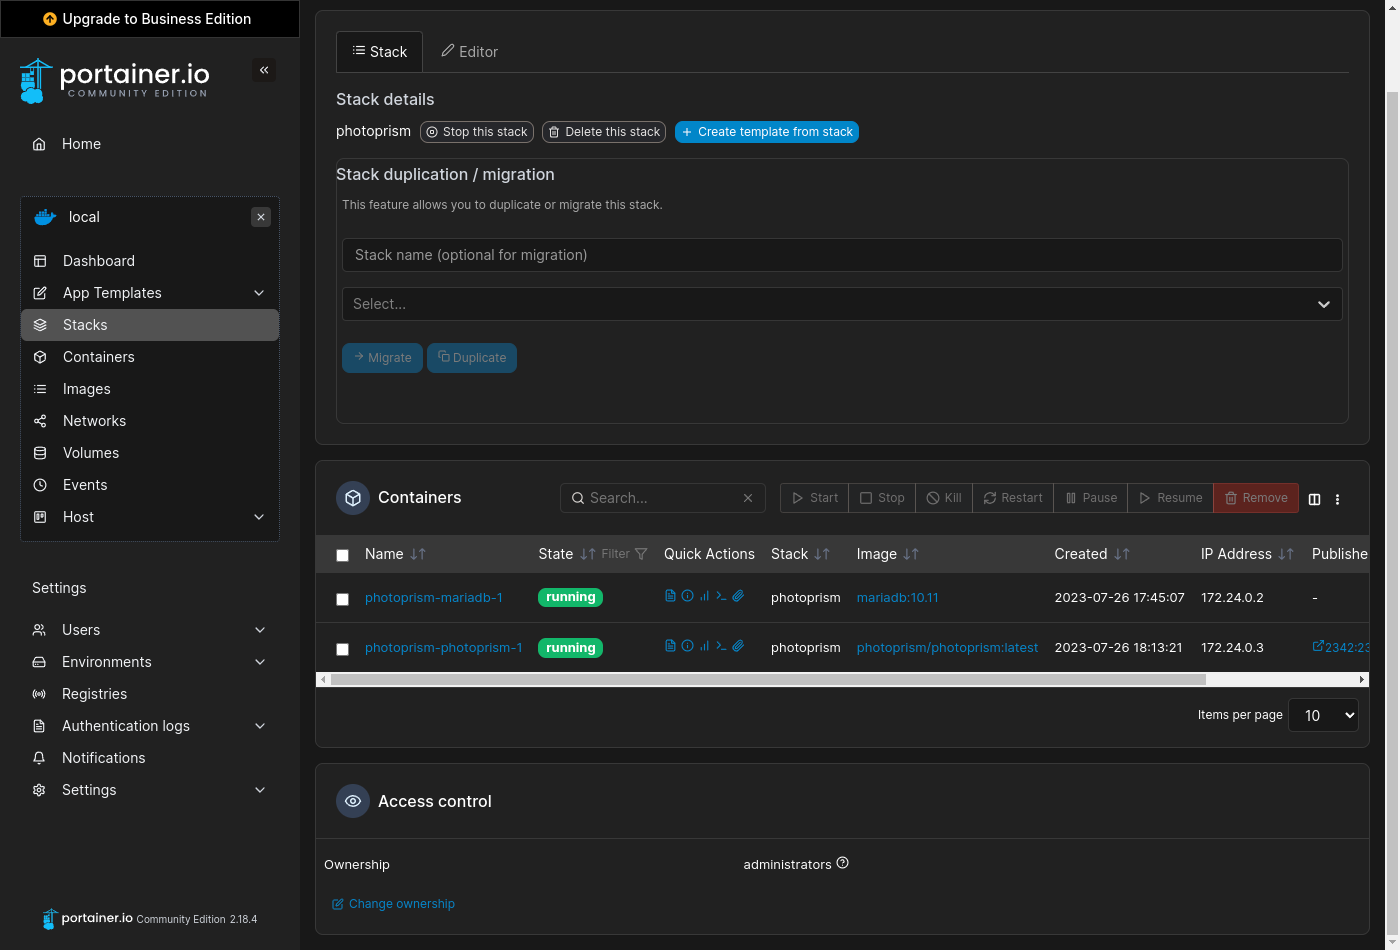
Now click the :fontawesome-solid-terminal: button belonging to the photoprism-photoprism-1 container and accept the default settings to open a terminal:
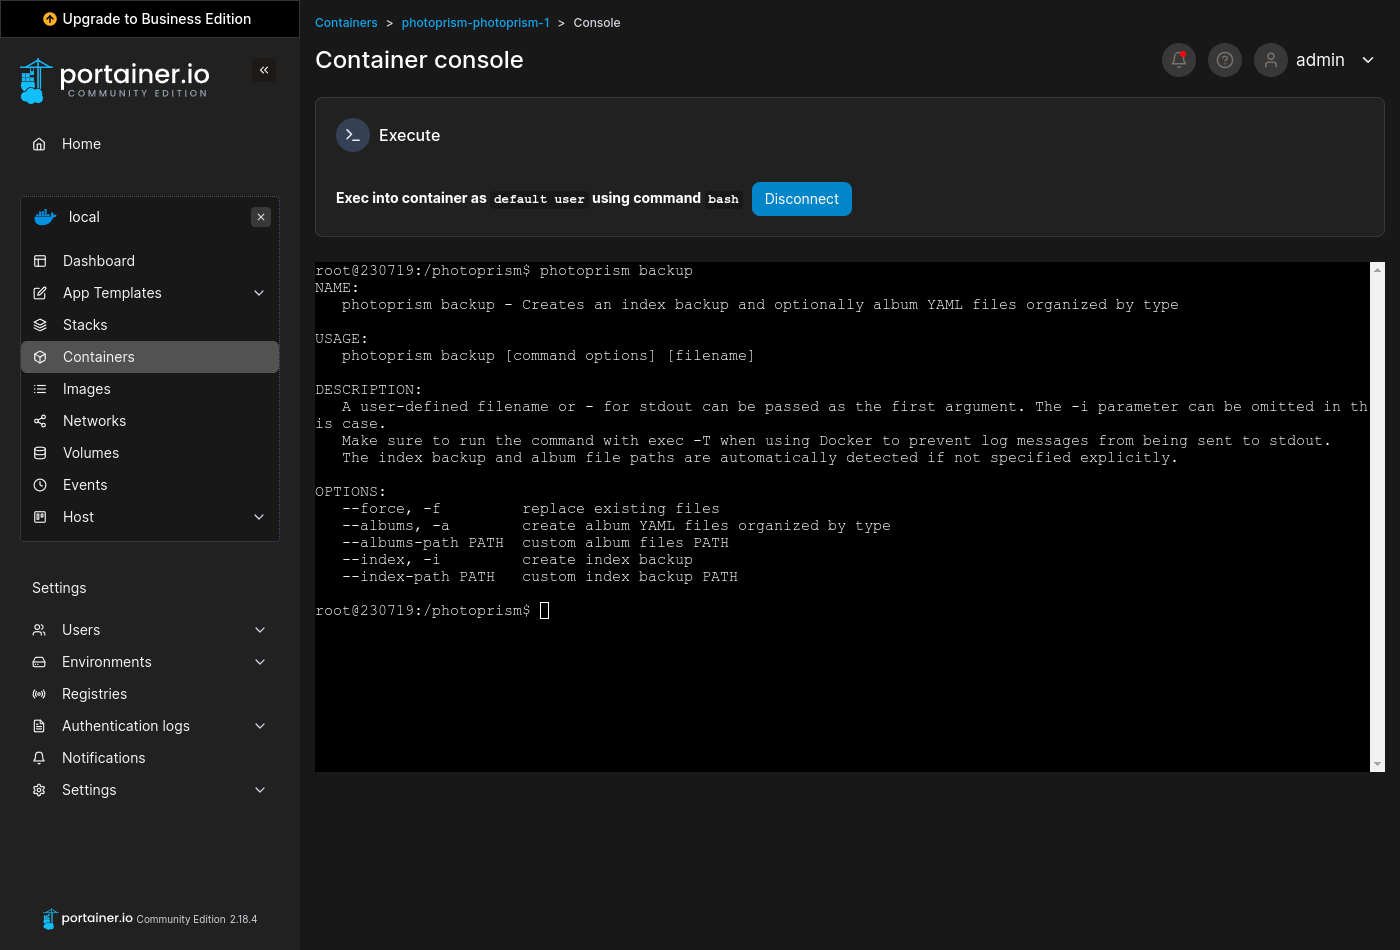
Running photoprism help lists all commands and options available in the current version:
photoprism helpUse the --help flag to see a detailed command description, for example:
photoprism backup --helpThe command-line interface is also well suited for job automation using a scheduler.
Examples
| Action | Command |
|---|---|
| Display Config Values | photoprism show config |
| Show Migration Status | photoprism migrations ls |
| Repeat Failed Migrations | photoprism migrations run -f |
| Reset Database | photoprism reset --yes |
| Backup Database | photoprism backup -a -i |
| Restore Database | photoprism restore -a -i |
| Change Password | photoprism passwd [username] |
| Remove Password | photoprism passwd --rm [username] |
| Show User Management Commands | photoprism users help |
| Reset User Accounts | photoprism users reset --yes |
| Reset Sessions and Access Tokens | photoprism auth reset --yes |
| Show Face Recognition Commands | photoprism faces help |
| Index Faces | photoprism faces index |
| Reset People & Faces | photoprism faces reset -f |
| Transcode Videos to AVC | photoprism convert |
| Regenerate Thumbnails | photoprism thumbs -f |
| Update Index | photoprism index --cleanup |
| Move to Originals | photoprism import [path] |
| Copy to Originals | photoprism cp [path] |
PhotoPrism® Documentation
For more information on specific features, services and related resources, please refer to the other documentation available in our Knowledge Base and User Guide: